Explorer.exe not Starting when Windows 10 Starts [SOLVED]
If you’re having problems with Explorer.exe not opening automatically every time you boot up your PC, it could be caused by one of the following reasons:
1. You’ve installed a program that doesn’t support Windows 8/8.1.
2. Your antivirus application has disabled some programs.
3. Some programs prevent Explorer.exe from running.
4. There’s something wrong with your registry.
5. A virus infection is preventing Explorer.exe from loading properly.
6. An old version of Windows is being used.
SOLUTION 1 – Disable the Fast Startup setting
Some users claim that disabling the Fast Startup setting will help solve the problem. However, there are some drawbacks associated with doing this. First off, you won’t be able to boot into Windows 10 anymore. Secondly, it could prevent you from accessing important data like pictures, videos, documents, etc. Thirdly, you’ll lose access to programs that require the Fast Startup feature. Lastly, it could make your PC run slower.
Disabling the Fast Startup setting might cause other problems too. For example, you might end up losing access to important data like pictures, video, documents, etc. You might even lose access to programs that rely on the Fast Startup feature. Finally, it could make your computer run slower.
If you want to try this solution, follow these steps:
1. Select Never let me choose what turns my screen back on or puts my device to sleep.
2. Press Apply.
3. Restart your computer.
SOLUTION 2 – Perform SFC scan and DISM tool’s restore health
To fix the problem, we recommend running the System File Checker (SFC). This tool scans the computer for problems such as missing or corrupt system files, registry errors, startup items that are no longer needed, and more. You can download it directly from Microsoft here. If you want to perform a full disk cleanup, you can use Disk Cleanup. In addition, you can use the Windows Recovery Environment (Windows RE), which includes tools like Bootrec /fixmbr, Bootrec /fixboot, and Bootsect /rebuild.
If you still cannot boot into Windows 10, try repairing the installation using the built-in recovery options. These include Command Prompt, Safe Mode, and System Restore.
For more information about how to solve the error 0x80073712 please refer to our article.
SOLUTION 3 – Modify the necessary services
To fix the problem, we should run the command “sihost.exe”. You can find out how to do this by opening the Windows Services MMC Console. Then, select the service named “Shell Infrastructure Host Service”, and press Start. After doing this, the service will be running normally.
When you open the Windows Services window, you will see the name of the service, along with the current status. If the status reads “Stopped”, you should change it to “Started.” This way, the service will be able to work properly.
You can check whether the service is working correctly by checking the event log. If there are errors related to the service, you should look into them.
If you want to know more about this topic, please refer to our article titled “How to Fix ‘Windows Server 2008 R2 App Readiness’ Error?”
SOLUTION 4 – Change the Display settings
Sometimes, if any user has changed the display resolution and other setting, this might lead to such problems mentioned in this article above. If you are facing such issues, try following the steps mentioned below.
1. Tap Build Number 7 times
2. Scroll down to find the option named “Screen Size”. Set it to Large
3. Restart your phone
4. Open up Play Store again and see if there is no error now.
SOLUTION 5 – Reinstall the Display driver
This guide will help you fix the following issues related to display drivers:
1. Black screen during boot up
2. Screen flickering
3. Blue screen of death
4. Blank screen
5. Unable to connect to a monitor
6. Monitor turns off automatically
SOLUTION 6 – Edit the Shell key in the Registry File
The Windows registry is a database used to store information about programs installed on your system. If it gets corrupted, you might face issues like missing icons, slow performance, error messages, etc. In such cases, you must make some changes in the registry. Here we are sharing a simple tutorial on how to edit the shell key of the windows registry.
Step 1: Open the regedit application.
Step 2: Click on HKEY_LOCAL_MACHINE\SOFTWARE\Microsoft\Windows NT\CurrentVersion\Winlogon.
Step 4: Enter the name of the key as Shell.
Step 5: Select REG_EXPAND_SZ data type.
Step 6: Type %SystemRoot%\system32\shell.exe -c “C:\Program Files\Internet Explorer\iexplore.exe” -noframemerging “%1” into the Value Data box.
Step 7: Press OK button.
Step 8: Close the regedit application. Now restart the system and check whether the problem still exists.
If you want to learn more about the registry, you can read our previous articles here.
Restarting the Windows Explorer.exe Process
To restart the explorer.exe, you must know what filename it uses. You can find out by typing tasklist into the command prompt. This will list every running program, including those that are hidden. When you see the explorer.exe listed under processes, double-click on it to bring up the properties window. Look for the image below.
If you don’t know what the filename is, you can use the following method to determine it. Open the Start menu and select Run. Type “cmd”. A black box will pop up. In the box, type “tasklist /fi \”ImagePath eq c:\windows\explorer.exe\””, where ImagePath is the path to the executable. For example, if the executable is located in the folder C:\Windows\System32, the command would look like this: “tasklist /fi «ImagePath eq c:\WINDOWS\SYSTEM32»”.
You can now close the cmd window. Double-click on the explorer.exe icon again to start the application.
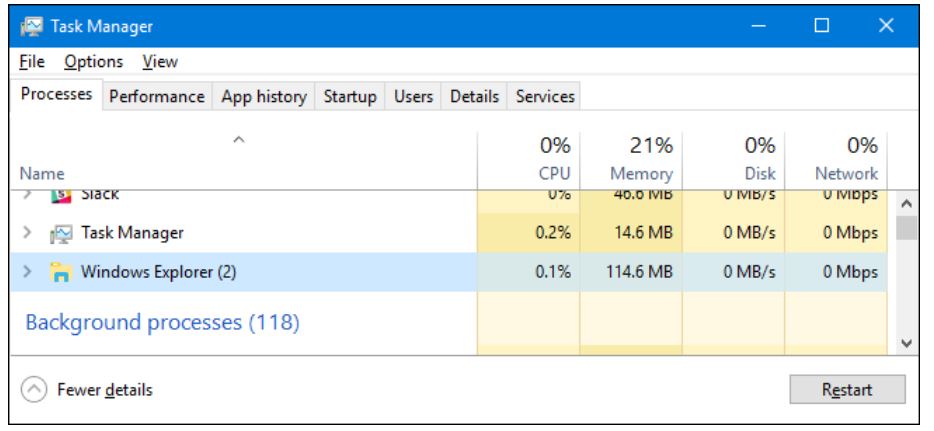
SOLUTION 1: Restart Windows Explorer.exe via Windows 10 Task Manager
To restart explorer.exe in Windows 10, press ctrl+alt+delete and select task manager. This brings up the task manager where you can see all running processes. Click on explorer.exe and hit “End Process”. You can do it again if needed.
SOLUTION 2: Restart Windows Explorer.exe from the Command Prompt
To fix explorer.exe freezing issues, you should try restarting the computer. This is one of the easiest solutions to the problem. You just need to press Ctrl+Alt+Del keys together to reboot the system. If it doesn’t work, there are some other methods you could use to fix the issue. Here we list out three different methods to help you fix the problem.
1. Method 1: Restart Windows Explorer from the Command Prompt
If you want to do something manually, you can open up the command prompt window and type “explorer.exe /restart”. Press Enter key to execute the command.
2. Method 2: Restart Windows Exploder.exe from the Command Line
You can also go into the Start menu and select Run. Type cmd and hit enter. In the command prompt window, type explorer.exe /restart and press Enter key to execute the process.
3. Method 3: Reboot Your Computer
Finally, you can always reboot your computer. Just turn off your computer and wait for 10 seconds. Then turn it back on again.
SOLUTION 3: Exit Explorer and then restart it via Task Manager
If you’re having trouble opening a.zip file, try exiting Internet Explorer completely and then restarting it via the task manager. If you still cannot open the file, try downloading another copy of IE.

Tim Wiley was a tech writer for seven years at Recode. In that time, he covered everything from basic browser.js and URL parameters to XHRs, performance, malware, security, enterprise apps, social media, and Windows secrets. He also written about how to hack Signal in 2016 and how to resist, or possibly even conquer, the zero-day threat.