Fix: High Disk/CPU Usage by Super Fetch
High CPU usage is one of the most annoying problems that you might encounter while using Windows 10. You might find yourself constantly checking your system performance monitor just to see what’s causing it. If you don’t know how to solve this problem, here’s a quick guide that will help you identify the cause and resolve it.
The first thing you need to do is check whether there are any processes running in the background that are consuming too much resources. To do this, open Task Manager and look for processes that use up a lot of memory and CPU cycles. Once you’ve identified the culprit, close it down.
If you still experience high CPU usage even after closing the process, try restarting your computer. Sometimes, rebooting helps clear out some leftover files and programs that could be causing the problem.
If none of the above methods work, you can always download the free tool Restoro PC Repair Tool. This tool scans your hard disk and identifies the issues that are slowing down your computer. After fixing those issues, you can reboot your computer without worrying about high CPU usage again.
What exactly is Superfetch?
Superfetch is a feature built into Windows 10 that helps speed up boot times and improves overall system performance. It caches frequently used files and programs onto the hard disk drive, making them ready for quick access. This way, you don’t have to wait for the computer to load each file every time you start up.
There are many ways to optimize superfastboot.exe, including disabling unnecessary startup items, cleaning out temporary files, and deleting unused registry keys.
What is the purpose of Service Host Superfetch?
Superfetch is an app designed to keep track of what you’re doing. When you open a program like Photoshop, Superfetch loads the program into memory immediately. This way, when you start working, the program is already loaded and ready to go.
This feature works because it uses algorithms to figure out which programs you’ll use the most frequently. So, even though you might think you don’t use Photoshop every day, Superfetch knows that you probably do. And since it’s already loaded into memory, opening Photoshop doesn’t take long.
Understanding the high disk usage of the service host SysMain
Sysmain is a service used by Microsoft Windows OS to manage the memory allocation and process scheduling. This service consumes significant amount of RAM and CPU resources. If it runs continuously, it could cause performance issues. In some cases, disabling SysMain service might help resolve such problems.
In this article we are explaining how to disable SysMain Service using Command Prompt.
Automatic Windows Repair Tool
Restoro is an automatic repair software which scans your computer for any missing, corrupted or damaged files. If it finds something wrong, it automatically repairs the file. This way, you don’t have to worry about repairing each error manually. You just run the program and let it do its job.
If you are looking for a reliable tool to fix common problems like virus infections, system crashes, registry issues, etc., Restoro is what you need. It is easy to install and works without any hassle.
The program offers many features such as scanning for viruses, malware, spyware, adware, browser hijackers, rootkits, startup items, autostart entries, and much more.
You can choose whether you want to repair individual files or groups of files. In addition, you can select specific types of files to be repaired. For example, you can specify that you want to repair.exe files,.dll files,.txt files,.jpg files, etc.
Restoro supports both 32-bit and 64-bit versions of Windows operating systems.
Method 1: Conduct a Malware and Virus Scan
Your computer might be infected with a virus, spyware, adware or some other malicious software. If you are experiencing slow performance, frequent crashes, unexpected shutdowns, etc., it could be because of a virus or malware infection. To scan for viruses and malware, follow these steps:
1. Download and install a reputable anti-malware program such as AVG AntiVirus Free Edition.
2. Run the program and select “Scan Now”.
3. Click on “Start Scanning” button.
4. Wait while the program scans your entire hard disk.
5. When finished, click on “Quarantine Selected Items”, and then click on “OK”.
6. After scanning, you’ll see a list of items that were detected during the scan. Select each item and choose whether you want to quarantine or delete it.
Method 2: Utilize SFC scan
Type “sfc /scannow” into the Command Prompt window. This command scans your entire hard disk for missing or corrupt Windows system files. If it finds any, it displays a list of those files along with information about what needs to be done to fix each problem. You can use this method to find and repair corrupted system files caused by malware infections, hardware failures, improper shutdowns, power surges, and many other issues.
You can run the ScanNow utility even if you don’t have administrator privileges. To do this, type “sfc /scantp:” followed by the name of the folder where you want to store the resulting report. For example, if you’re running the tool from the %SystemRoot%\system32 directory, type “sfc scantp:\”.
If you’re prompted for permission to access the file system, enter your password. Then press Enter again to continue scanning. When the scan completes, open the System File Checker dialog box and review the results. Click OK to exit the program.
Method 3: Turn off Intelligent Transfer Service backup
To disable backup intelligent transfer service:
1. Open Device Manager.
2. Right-click the device name and select Properties.
3. Select the Backup tab.
4. Click the Advanced button.
5. In the Backup settings section, uncheck the Enable Automatic Backups box.
6. Restart the computer.
Method 4: Disable SUPERFETCH SERVICE
This method should work for all version of Windows 10. If you are having issues with high memory and disk space usage, this might help.
1. Open Command Prompt window.
2. Type “net stop superfetch”. Press Enter key.
3. Type “superfetch /?” and press enter.
4. You will see a list of options. Select option number 3.
5. Type “exit”, press ENTER key.
6. Restart computer.
7. Check system performance.
8. Enjoy!
Method 5: Turn off auto-updates
This method will disable automatic updates on Windows 10 PCs. You’ll still receive notifications about critical updates, but it won’t download anything automatically. If you want to continue receiving updates, you’ll need to manually check for updates every now and again.
If you’re worried about missing out on important security fixes, there are ways to make sure you always receive those updates. One way is to use Microsoft’s System Update Readiness Toolkit. It checks whether you’ve received the latest updates and offers to download and apply them for you.
The toolkit is included with Windows 10 Home and Pro editions; you can find instructions here.
Another option is to use Windows Defender Application Guard. With this feature, you can run apps like Chrome, Edge, and Internet Explorer in a sandboxed environment. Apps running in this mode aren’t able to access files outside of the app’s folder, so they can’t steal information or infect your computer.
You can learn more about how to protect yourself against malware and viruses here.
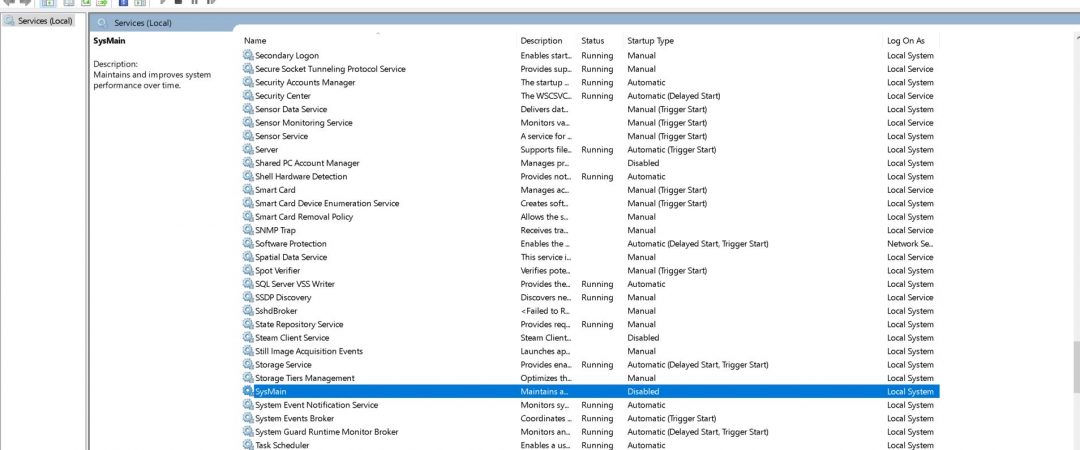
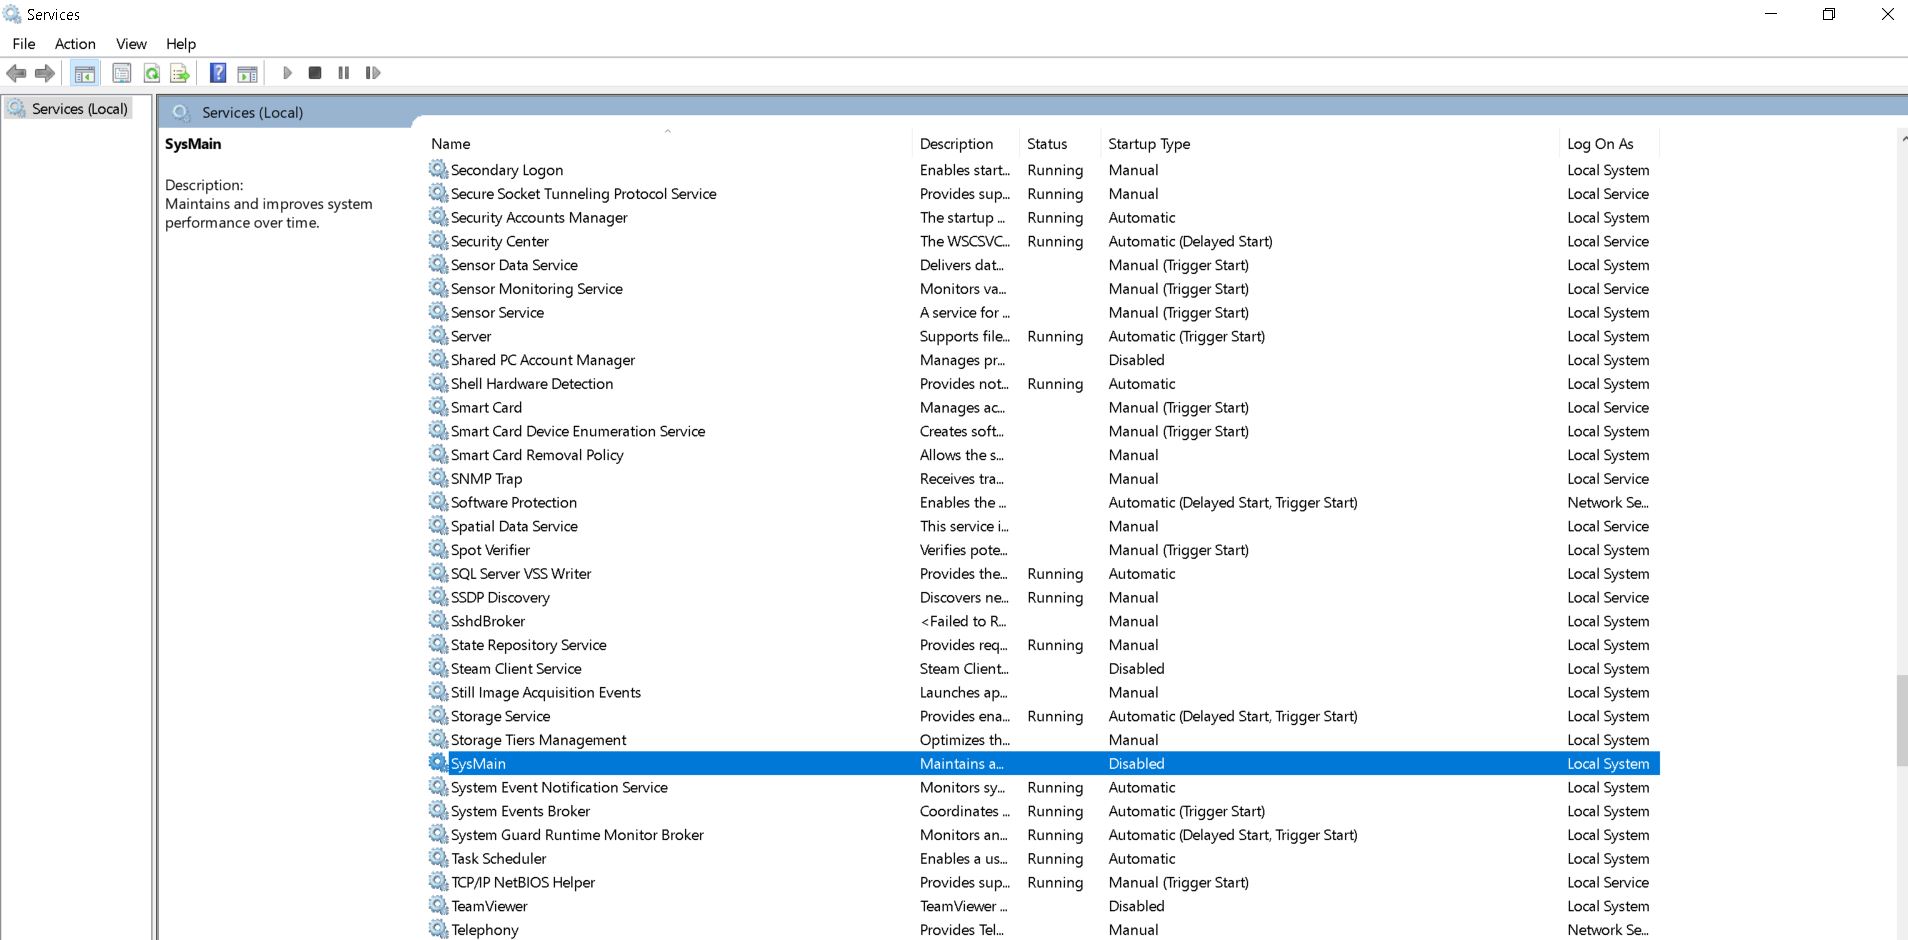
Method 6: Use the Service Manager to turn off the SysMain service.
The SysMain service is used by Windows Update to check for updates on computers. If you don’t want it to run automatically, use this method to disable it.
This method stops the SysMain service, but doesn’t kill any other processes.
Method 7: Use an elevated command prompt to turn off SysMain.
In this article, I am going to show you how to use elevated command prompt to disable Sysmain. If you are familiar with Windows 10, you might know that there is a process called SysMain that runs everytime you boot up your computer. You can see it in Task Manager under Services tab.
This process is responsible for starting some important system processes such as System Restore, Automatic Updates, etc. So, disabling this process will help us to avoid unnecessary startup applications. Let’s take a look at the steps involved in disabling SysMain.
Step 1: Open Run dialog box by pressing Win+R keys together. Type cmd into the textbox and press Enter key.
Step 2: Now type sc stop “SysMain.” Press Enter key.
Step 3: In the next step, type sc config “SysMain.exe” start disabled. Press Enter key.
Now, restart your PC and check whether SysMain is disabled or not. If everything goes well, you won’t find SysMain in Task Manager anymore.
If you want to enable SysMain again, just follow the same procedure mentioned above.
Method 8: Use Registry Editor to turn off SysMain
This method helps avoid high disk space usage in Windows 10 errors. If you are experiencing high disk space usage in windows 10 error messages like “Windows cannot allocate enough memory to complete this operation”, “The process cannot access the file because it is being used by another process”, “Cannot read data from the physical device.” Then follow the steps given below to disable SysMain service.
Step 1: Open regedit.exe and navigate to HKEY_LOCAL_MACHINE\SYSTEM\CurrentControlSet\Services\.
Step 2: Find the name of the service you want to stop. For example, if you want to stop the SysMain service, find the following key:
HKEY_LOCAL_ MACHINE \ SYSTEM \ CurrentControlSet \ Services \ SysMain
Step 3: Right-click on the value named ServiceName and select Delete.
Step 4: Restart your computer.
If you still see the same issue, try disabling the service again.

Tim Wiley was a tech writer for seven years at Recode. In that time, he covered everything from basic browser.js and URL parameters to XHRs, performance, malware, security, enterprise apps, social media, and Windows secrets. He also written about how to hack Signal in 2016 and how to resist, or possibly even conquer, the zero-day threat.