How to Access the Startup Folder on Windows 11/10
The Startup folder is where programs are stored when you start up your computer. This will open the Startup folder. Select the account you wish to view startup items for, and then click Change. Click Advanced Settings under Startup Options. In the Startup tab, look for the Startup folder listed there.
Utilize Windows 11’s Startup Folder
There are two ways to access Startup folder in Windows 10: through the Start menu and via the Run command. In Windows 8/8.1 you could use the Search function to find it. However, there are some differences between how the Startup folder works in Windows 10 and earlier versions. Here’s what you need to know about accessing the Startup folder in Windows 10.
What is the Startup folder in Windows?
The Windows startup folder contains files that start up programs automatically when you turn on your computer. These include programs such as Internet Explorer, Microsoft Word, and Adobe Reader. If you delete these files, it could cause problems with your operating system.
Then press OK. Now look under the following folders:
C:\Windows\System32\config\systemprofile\Desktop\Microsoft\Windows\Start Menu\Programs\Startup
C:\Users\\AppData\Roaming\Microsoft\Windows\Recent\AutomaticDestinations
C:\Users\Default\AppData\Roaming\microsoft\windows\start menu\programs\startup
Where is Windows 11/10’s Startup
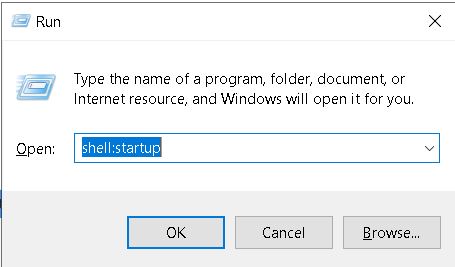
In Windows 10, the Startup menu is no longer accessible via the Start button. Instead, you have to press Winkey + R, type shell:startup and hit Enter. From there, you can access the Startup folder and select what programs start up automatically when you log into your computer.
The Startup folder is hidden by design in Windows 10. To do this, open File Explorer, navigate to the Startup folder and press Ctrl+H to toggle the visibility of hidden items.
Use Shell Command
Windows 10 includes a built-in tool called PowerShell that allows you to automate tasks and perform complex operations. You can use it to manage computers remotely, install software, troubleshoot problems, and much more. In fact, Microsoft even recommends that you learn how to use PowerShell because it provides many benefits over traditional methods.
To access PowerShell, open the Start Menu and type “PowerShell” into the Search bar. Click on the icon that appears. If you don’t see one, you might need to update your system.
You can now start typing commands into the textbox that appears. For example, you could type “dir” to list the contents of the current directory. Or you could type “Get-Process” to display information about running processes.
If you want to execute a command, simply press Enter. A prompt will appear asking whether you want to continue. Type y to confirm.
The next step is to save the command you just typed. Name the shortcut whatever you like. Then, navigate to the location you wish to place the shortcut. Finally, double-click the shortcut to launch the program.
You can also use PowerShell to delete unwanted shortcuts. Simply type “Remove-Item” followed by the name of the shortcut.
Create New Shortcut Directly
To create shortcuts directly, you need to open the Start menu and go to the Startup folder. Once there, you can drag and drop applications into the Startup folder.
A shortcut will work if you launch it once. If you want to run the program daily or weekly, however, you should consider creating a registry entry. Registry entries are stored in the HKEY_CURRENT_USER\Software\Microsoft\Windows\CurrentVersion\Run key. This key stores information about programs that start automatically. For example, you could add a value named “MyApp” to the Run key. Then, whenever you run MyApp, Windows will look up the value in the Run key and execute whatever command is specified.
Move Shortcut From Desktop (Current User and All-User Startup Folders)
Shortcuts are one of those things we use every day without thinking about it. They’re great because you don’t have to remember where you put something—you just open up the Start menu and go straight to what you want. But sometimes, shortcuts become too much of a good thing. You might find yourself opening the same shortcut over and over again, or you might accidentally delete one of your favorite shortcuts. To avoid these problems, you can move shortcuts from the current user startup folder to the all-user startup folder.
To do this, follow these steps:
1. Open Windows Explorer.
2. 3. Select the General tab.
4. In the Startup section, select the option labeled “Show hidden files and folders.”
5. Check the box next to “Create shortcuts on the desktop,” and press OK.
How to Remove Programs from the Windows 11 Startup Folder
The Start menu is one of those things that people either love or hate. If you’re like me, you use it every day, but don’t really know what it does. I’m sure there are some cool features hidden away in there somewhere, but I’ve never found them. Well, now I do. Here are five tips to help you delete programs from the start up folder in Windows 10.
1. Click “Turn Windows features on or off.”
2. Scroll down to find the feature you want to disable.
3. Select “Disable,” and hit OK.
4. Restart your computer.
5. You’ll see the program no longer loads automatically.
Control additional startup applications in Windows 11
The Task Manager lets you see what applications are running in the background, even those that aren’t listed in the Start menu. This includes apps that start automatically at boot time, such as Microsoft Edge, Cortana, and the Calculator app. If you want to disable one of these programs, open the Task Manager and select it from the list. Then, choose Disable from the context menu.
You can also use the Task Manager to close down apps that aren’t responding properly. To do this, press Ctrl+Shift+Esc to open the Task Manager, and then select End Process Tree from the left pane. Finally, you can delete apps completely by selecting Delete from the context menu. Note that deleting an application doesn’t necessarily mean that it won’t run again; some apps store data locally, and reinstalling them isn’t always possible.
Control Startup Apps through Settings
If you want to control what apps start up automatically when you boot your phone, there are several ways to do it. One way is to use Tasker, a powerful automation tool that lets you automate tasks based on conditions like location, time, date, and even network connectivity. Another option is to use the built-in settings menu. Here we’ll show you how to manage startup apps via the settings menu.
The process is pretty simple. First, open the settings menu by tapping the gear icon in the upper left corner of the screen. Then tap “Apps.” Scroll down to find the list of apps that start up automatically. Tap each one to see what happens when it starts up. If you don’t like what you see, simply tap the red button next to the app name to disable it.
You can also set individual apps to auto-startup. To do that, go into the same section of the settings menu and scroll down to find the “Auto Start” section. There you’ll see a list of apps that will start up automatically. Simply tap the checkbox next to the app you’d like to enable.
To make sure everything works properly, you might want to reboot your device once you’ve finished making changes.
Utilize Task Manager to control startup programs
To access the task manager, go to the Windows desktop and rightclick the Start button, then choose Task Manager. You’ll see a list of applications running on your computer. Click the Processes tab to view detailed information about each process. Rightclick a process and you can stop it, start it again, or kill it. If you want to disable an application, select it in the list and press Disable. To enable it, do the same thing.

Tim Wiley was a tech writer for seven years at Recode. In that time, he covered everything from basic browser.js and URL parameters to XHRs, performance, malware, security, enterprise apps, social media, and Windows secrets. He also written about how to hack Signal in 2016 and how to resist, or possibly even conquer, the zero-day threat.