How to Disable/Enable Notifications on Windows 11
Windows 10 introduced a number of changes to the operating system including the addition of the “notification area”. This area appears on the taskbar and allows you to see messages such as emails, calendar reminders, and social media alerts without having to open up the respective apps. However, it does come with some drawbacks.
For example, there are times when you want to keep track of what’s happening on your computer even while you’re away from it. In those cases, you might find yourself constantly checking the notification area every few seconds just to make sure nothing important has popped up. If you don’t want to deal with this constant distraction, here’s how to turn off the notification area altogether.
Step 1: Click on the Start button and select Settings.
Step 2: Scroll down and uncheck Show notifications and actions in the Notification Area.
Step 3: Restart your PC and check out the change. You should now no longer be able to access the notification area.
If you’d like to do this on a per-application basis, follow the same steps above but simply scroll down to the Application Notifications section. Here, you can choose whether to allow each app to display notifications in the notification area.
Windows 11 notifications can be turned off.
Windows 10 introduced a new feature called “Notifications,” which allows you to receive alerts about things happening on your computer. You can choose whether you want to see messages from friends, emails, calendar events, or even text messages. If you don’t want to see those types of notifications, you can disable them. However, there are some exceptions. For example, Microsoft Edge doesn’t support disabling notifications.
To disable notifications on Windows 10, follow these steps:
1. Open Settings.
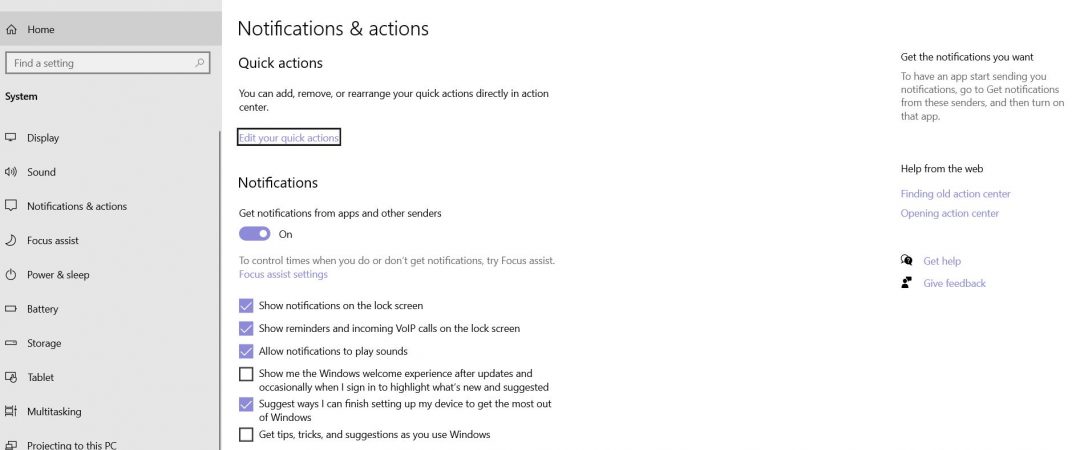
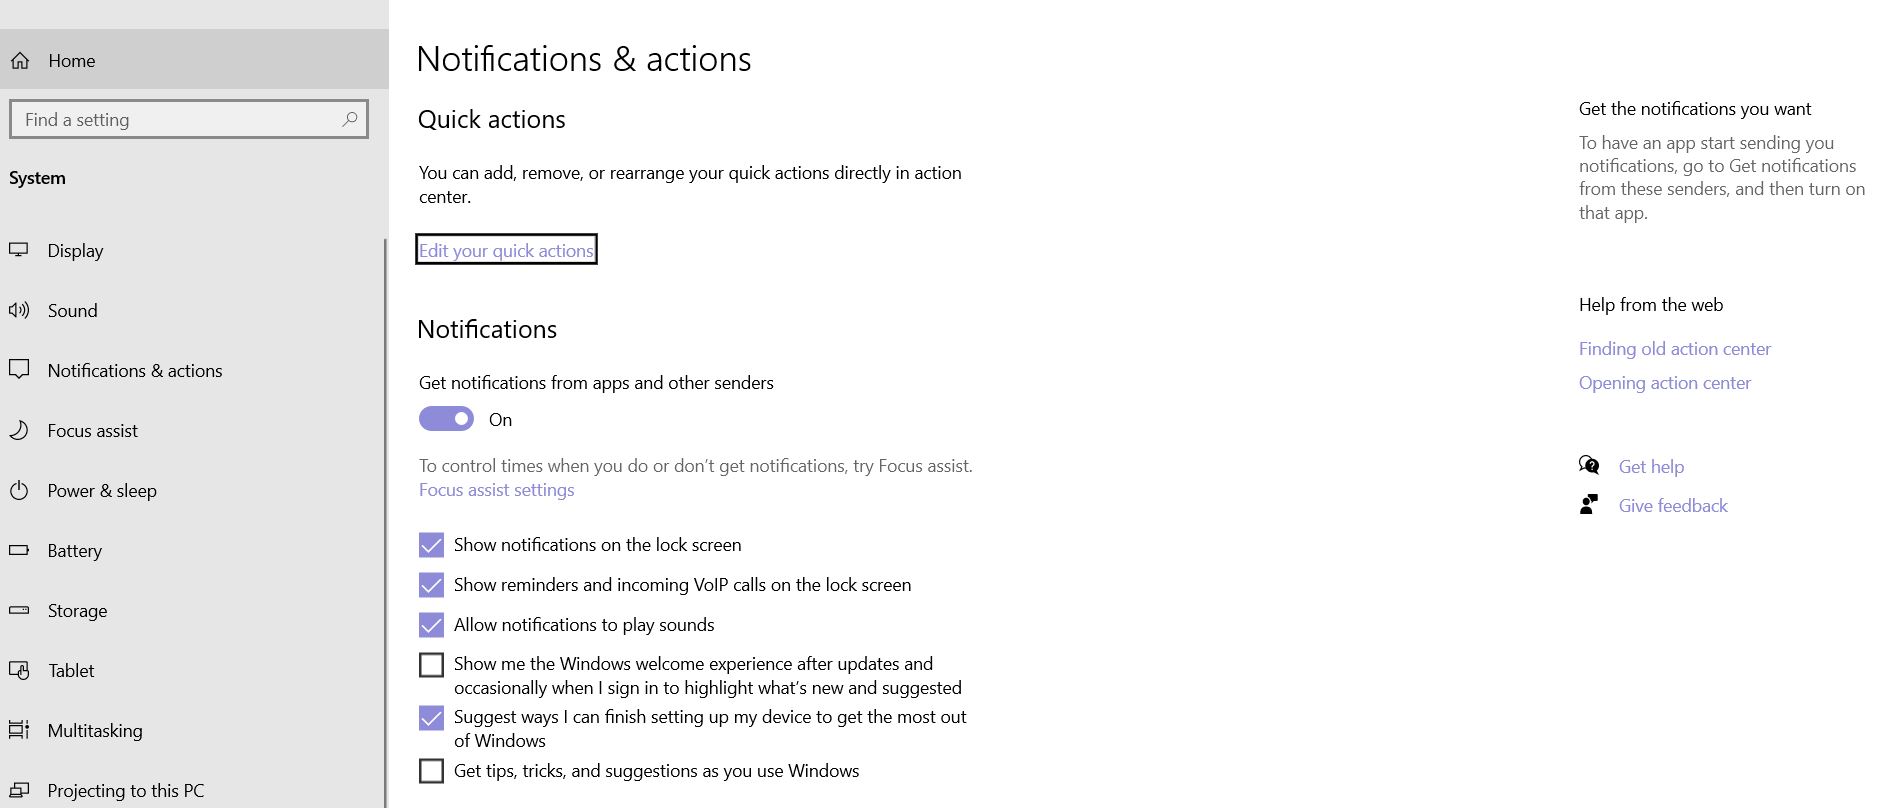
2. Click Notifications & actions.
3. Select the option you want to change.
4. Scroll down and select the option you want to use.
5. Press OK.
6. Restart your PC.
7. Enjoy your new, clean desktop.
Disable notifications per app on Windows 11
Windows 10 introduced a feature called “Notifications,” where you could receive alerts about things like emails, text messages, calendar events, etc. While it sounds great, there are times when you don’t want to see every notification pop up on your screen. If you’re looking to disable notifications for individual apps, here’s how.
1. Click the gear icon next to “Apps.”
2. Select “Manage Apps Notifications.”
3. Scroll down and select the app you’d like to disable notifications for.
4. Hit the checkbox next to “Turn Off Notifications.”
5. Repeat steps 3-5 for each app you’d like to limit notifications for.
6. Restart your PC to apply changes.
7. Enjoy the peace and quiet.
Deactivate notifications with Registry on Windows 11
Windows 10 introduced a feature called “Notifications,” which allows you to receive alerts about important events like messages, calendar reminders, and system updates. However, it seems that Microsoft forgot to disable the option completely. If you’re running Windows 10 Home or Pro version 1607 or later, you might want to check out how to disable the notification center.
The process is quite simple; just follow our guide below. You’ll learn how to open the registry editor, find the correct key, edit the value, and save changes.
Step 1: Open the Registry Editor
Alternatively, you can type regedit into the search bar and press Enter.
Step 2: Find the Notification Center Key
Navigate to HKEY_CURRENT_USER\Software\Microsoft\Windows NT\CurrentVersion\Winlogon. In there, look for the following subkey named WinLogonNotify:
HKEY_CURRENT_USERSoftwareMicrosoftWindowsNTcurrentversionWinLogonnotify
Activate notifications on Windows 11
Windows 10 introduced a number of features that make it easier to use your computer. One of those features is called “notifications,” which lets you see messages like emails, texts, and calendar events pop up on your screen. But sometimes, you might miss important information because you’re too busy doing something else. To help you out, Microsoft added a way to turn on notifications even when you don’t have focus. Here’s how to do it.
Step 2: Click the + button next to the “Notification area” section.
Step 3: Choose whether you want to receive notifications while you are typing, browsing the web, watching videos, playing games, or just about anything else.
Step 4: You’ll now see a small icon in the system tray that looks like a bell. If you’d rather not have notifications show up there, you can choose to hide it.
Step 5: When you’re done, click OK.
You can change your settings anytime by opening the same menu again.
Windows 11: Enable notifications for each app
Windows 10 Mobile now supports apps sending push notifications directly to devices via the Microsoft Push Notification Service (MSPNS). With this update, you no longer have to open the app to send it a notification; just tap the tile and select “Notify me.” You’ll see a pop up window where you can choose whether to allow the app to send you notifications. If you don’t want to receive those messages anymore, simply hit the X button next to the notification icon.
This feature works with both Android and iOS apps.
Utilize the Windows 11 registry to enable notifications.
To enable system and app notifications in Windows 10, you must do it manually. In fact, there are several ways to enable notifications on Windows 10. However, some methods require additional software or tools. For example, you can use Microsoft’s Power Management API to turn off power management features. You can also use third-party apps like NotifyMe Pro to manage notifications. But what about those who don’t want to install any extra software? Well, here’s how to enable notifications on Windows without installing any software.
Navigate to the following path:HKEY_LOCATION_MACHINE\Software\Microsoft\Windows\CurrentVersion\PowerManagement\NotificationSettings
Double-click the ToastEnabled DWORDSet its value to 1.Restart the computer.
You can now see notification icons on the taskbar.
How to Control Notifications in Particular Apps
Windows 10 includes a feature called “Notification Settings,” where you can choose whether to receive push alerts from certain apps. This lets you decide what kinds of messages you want to see from different apps. For example, you might want to block Facebook Messenger from sending you notifications about new chats. Or maybe you don’t want to hear about emails from work anymore.
You can manage notification settings for individual apps, too. If you’re worried about accidentally changing something, you can always go into Control Panel and change it manually.
Alternative Method
To turn off notifications for an app, you must go into its settings and disable the option to show notifications. This method works for both desktop apps and mobile apps.
There are several ways to manage notification settings on Windows 10. You can do it manually, or use one of the following methods:
1. Right-click the taskbar and select Task Manager
2. In the upper left corner of the screen, click the gear icon and choose “Notification Settings”.
Activate or Deactivate the Notification Banner
The notification banner appears above the fold when you’re logged into Gmail. You’ll see it when someone sends you a message, replies to one of your messages, or adds you to a conversation.
Prioritize Notifications
Google introduced the ability to set notifications priorities in Android 7.0. With this feature, you can choose what type of alert you want to receive first. You can select from three options: important, normal, or none. Important alerts are those that require immediate attention, such as messages from friends or missed calls. Normal alerts include emails and text messages. None alerts mean that you won’t see anything unless it’s really urgent.

Tim Wiley was a tech writer for seven years at Recode. In that time, he covered everything from basic browser.js and URL parameters to XHRs, performance, malware, security, enterprise apps, social media, and Windows secrets. He also written about how to hack Signal in 2016 and how to resist, or possibly even conquer, the zero-day threat.