How to Enable or Disable USB Flash Drive Write Protection
There are two methods to turn write protection off on a USB stick. The first one requires you to change the settings in Windows 10. The second method uses an external program called “USB Drive Manager”. Both methods work fine, but some people prefer the latter because it doesn’t require opening up the computer.
Most devices don’t allow you remove the write protection without turning off the entire device. However, there are exceptions. For example, Kingston offers a software solution to protect data on the USB stick.
What Exactly Does Write-Protected Mean?
When you see a “Write protect” warning on your camera it usually means that there’s a locked tab or a write-protected memory card. You might think that this is just a way to keep people from accidentally erasing files, but it’s actually much worse than that.
If you’re having trouble deleting images from your camera, try reformatting the memory card. Formatting removes everything off of the card, including the file system itself. Once the card is formatted, you’ll be able to delete anything you want without worrying about losing data.
A readonly mode prevents you form writing data to an SD Card or other storage device. This could mean that your Camera’s internal memory is full. To fix this problem, you’ll need to either empty out some space or use a different type of memory card.
Locking tabs prevent you from moving photos to another folder or deleting them altogether. This could mean that you’ve got too many pictures stored on your camera’s internal memory. In this case, you’ll need to move some of those pictures to a different location or format the memory card.
Hardware switch for write protection
Write protection switches are useful for preventing accidental erasure of data on USB drives. They prevent the flash memory chips inside the storage device from being erased accidentally. This feature is usually found on external hard drives, thumb drives, portable media players, digital cameras, and other similar devices.
When writing to a USB device that contains a write protection switch, if there is one, turn it to “lock mode.” Lock mode prevents the flash memory chip from being erased. You can use this setting to protect sensitive information such as credit card numbers, passwords, and personal photos.
If you want to protect your files, you should always keep write protection switched to “locked.”
Changing read-only settings with DiskPart
To check if your USB flash drives are readonly, you can run the diskpart command. This command allows you to view information about your hard disks, partitions, volumes, and removable media devices. You can also change some properties like read-only status, file system type, volume label, partition table, etc.
Use the following syntax to list the current state of your USB flash drive:
You can find out the device name of your USB flash drive by running the following command:
The output of the above commands looks similar to the following screenshot:
If you want to change the read-only setting of your USB flash drive, run the following command:
Change the security settings in the flash drive properties.
To change security permissions, open Windows Explorer, locate the USB Flash Drive in your computer’s list of devices, right-click on the flash drive’s icon and select Properties. In the window that opens, click the File System button. This will display the file system type used by the device. If you see FAT32, it means that the flash drive is formatted in NTFS.
Click the Security tab. You will now see the current security settings for the flash drive. By default, the owner account has full control over the files stored on the flash drive. However, there are several options here that allow you to restrict access to specific folders or even individual files. For example, you could set up a folder called “My Documents” where you store personal documents and give everyone read/write permission, except for yourself, who gets read-only access. Or you could make sure no one else can access certain files, such as photos or videos.
You can also add additional accounts to the group that owns the flash drive. This allows multiple people to use the same flash drive without having to worry about conflicting permissions.
The file system NTFS
The NTFS file system is a Microsoft proprietary file systems used for storing data on hard drives. It is an extended version of the FAT32 file system. The NTFS file system supports volumes up to 2 terabytes in size.
The FAT file system
The FAT file system is one of the most common ways to store data on a computer. A FAT file system is used to organize information into folders, called directories, and each directory contains subfolders, known as subdirectories. Each folder holds a set number of files, and each file can hold a certain amount of data. Files are stored sequentially on disk.
A FAT file system uses 32 bits per sector, which limits it to 4 gigabytes (GB) of storage space. This limit makes it difficult to use FAT file systems on devices such as USB flash drives and external hard disks. To overcome this limitation, Microsoft developed the FAT32 file system.
Change write protection through Windows registry
Enable/Disable write protection on your USB flash drive through the Windows Registry. Change the Write Protect value from 0 to 1 or vice versa. Restart your computer after you change the Write Protect value.
Using chkdsk, you can repair USB flash drive problems.
Flash drives are great tools for transferring files around, but sometimes they can cause problems. If you use one regularly, it’s important to know how to fix common issues like corrupted partitions and missing files.
The chkdks tool is designed to check for errors on a flash drive. This tool works best with FAT32 formatted drives, but it can work with NTFS formatted drives too. You can download the program here.
Once you run the tool, you’ll see a list of errors found on the drive. To fix each error, simply select the option to repair the file system. Once complete, you can eject the drive and continue working normally.
If you find that there are no errors, you can safely ignore the output. However, if you do notice something wrong, you can try fixing the issue manually. For example, if you see that some files aren’t being read correctly, you might want to copy those files off the drive and replace them with copies from another source.
You can learn more about the chkdks utility in our guide to troubleshooting flash drives.
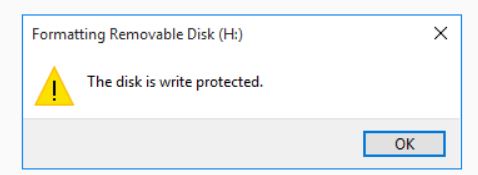
The USB flash drive should be formatted.
Formatting will erase any existing data on the device. This includes photos, videos, documents, etc. If you do not want to lose any information, it’s best to use a different USB flash drive. You can find one at most electronics stores or online retailers like Amazon.com.
There are many ways to format the USB flash drive, including Microsoft Windows Disk Management, Linux `fdisk`, Mac OS X diskutil and DOS format c:. All of these programs work similarly, but there are slight differences among them. For example, formatting a USB flash drive in Windows Disk Management requires opening up the computer’s Control Panel and selecting the Drive tab. In Linux, you must open up a terminal window and type `sudo fdisk /dev/sdX` where sdX represents the name of the USB flash drive. In Windows, you can use either the GUI or command prompt to format the USB flash drives. To format the USB flash drive via the GUI, follow these steps:
1. Open the Start menu and navigate to Computer.
2. Right-click on the USB flash drive icon and choose Properties.
3. Click on the Tools tab and select Change Drive Letter And Paths.
4. Select the option labeled Delete Volume.
Individual file security
The Windows operating system uses long filenames to store information about each file. This allows you to easily identify and locate specific files within folders. However, sometimes a single file can upset the balance of a folder. For example, imagine that you have a folder containing several large files. If one of those files becomes corrupted, it could cause problems for the entire folder. In such cases, it might make sense to protect the individual file.
To do so, select the file and press Ctrl+A. Then, in the Properties window, click the Security tab. Uncheck the Read Only box. Click OK twice to close both windows.

Tim Wiley was a tech writer for seven years at Recode. In that time, he covered everything from basic browser.js and URL parameters to XHRs, performance, malware, security, enterprise apps, social media, and Windows secrets. He also written about how to hack Signal in 2016 and how to resist, or possibly even conquer, the zero-day threat.