How to Get Out of Safe Mode on a Windows Computer
When you boot up your computer, it goes straight to normal mode without asking you anything. This happens because there’s no operating system installed on your hard disk. If you want to go into safe mode, you must do one of two things: Boot into Safe Mode or use the Command Prompt.
Boot Into Safe Mode
To boot into Safe Mode, press F8 during startup. You’ll see a menu where you can choose Safe Mode or Normal Mode. Choose Safe Mode and follow the instructions.
Use The Command Prompt
If you don’t know how to access the command prompt, here’s what you do:
1. Restart your computer.
2. Press Ctrl+Alt+Delete keys together.
Why would I need to restart my computer in Safe Mode?
Safe Mode is one of those features that most people don’t know about. If you’ve ever had trouble booting up your computer, it might be because there’s something wrong with your operating system. Or maybe you just want to see what happens when you turn off some of the programs that normally run automatically. Whatever the reason, here’s how to enter Safe Mode on Windows 10, 8, 7, Vista, XP, 2000, ME, 98SE, 95, NT 4.0, 2003 Server, 2008 Server, 2012 Server, 2008 R2, 2012 R2, 2016, and Windows CE.
Troubleshooting in Safe Mode
In Windows 10, there are three modes of operation: Normal, Recovery, and Safe Mode. You can access each one via the Start menu. To enter Safe Mode, press Ctrl+Shift+Esc keys together. This brings up the Advanced Startup Options window. Click Troubleshooting Information, and select Safe Mode.
When you boot into Safe Mode you lose all of your files and programs. However, it allows you to perform some basic maintenance tasks without having to reinstall everything. For example, you can check the status of your hard drives, repair corrupted registry entries, and even scan for malware.
If you want to use System Repair, you must reboot into normal mode before doing anything else.
Remove any recently installed software.
Software installation problems are common. Sometimes it’s because of a virus; sometimes it’s just a faulty download. Whatever the reason, you might find yourself stuck trying to uninstall the program. If you don’t know how to do it, here’s a quick guide to help you out.
Step 1: Open up Windows Explorer.
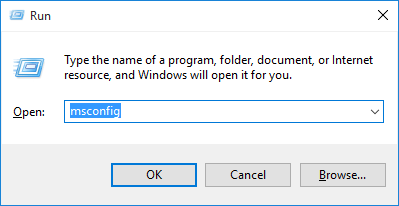
Step 3: Type “msconfig”. This opens up the system configuration utility.
Step 4: Select Startup tab. You’ll see a list of programs that start automatically. Find the one you want to stop. Right-click on it and select Delete.
Step 5: Restart your computer. When it boots back up, you’ll no longer have the problem.
Update outdated drivers
The most common reason for crashes is software incompatibility. If you are experiencing frequent crashes, it could be due to outdated drivers. Drivers are essential components of Windows 10 that allow hardware devices such as printers, scanners, cameras, etc., to communicate with the operating system. Updating outdated drivers can prevent crashes and improve performance.
To update drivers, you must first boot into Safe Mode. To do this, press F8 repeatedly during startup. This will bring up a menu where you can select Safe Mode. Once in Safe Mode, open Device Manager. Right-click each device listed there and choose Properties. Click Details tab and look for Driver Version. Compare the version number against what is shown in the table below.
If the version number is lower than the one shown in the table, download the latest driver from the manufacturer’s website. Install the downloaded file and reboot.
Remove any malware.
Malware is software designed to cause harm to a computer. When it infects a system, it often displays fake security alerts and popups, and even changes settings such as Internet Explorer’s homepage. If left unchecked, malware can slow down a PC, make it vulnerable to hackers, steal personal information, and even delete files.
There are several methods to remove malware. One method involves rebooting into Safe Mode. This is done by pressing F8 during startup. You will see a menu where you can select Safe Mode. Once there, you can run a scan to detect and remove malware. Another way to remove malware is to use the builtin Windows Defender tool.
Reinstall the operating system
If you are having problems with your PC, it might be because of some changes you’ve recently installed. You could try restoring your computer to its original settings. This process lets you access files without any interference caused by third party applications.
Safe Mode is available for all Windows OSes, including Windows 10, 8, 7, Vista, XP, 2000, ME, NT 4.0, 95, 98, 3.11, 2k, and even Server 2003.
To restore your computer to its original configuration, follow these steps:
1. Power off your PC.
2. Press and hold the F8 key while booting up your PC.
3. Select Safe Mode from the menu that appears.
4. When prompted, enter the administrator password.
Boot into “Safe Mode with Networking” in Windows 7/Vista/XP.
To boot into Safe Mode on Microsoft Windows Vista or 7, follow these steps:
1. Press the F8 key repeatedly while your computer boots up. You’ll see the Advanced Boot Options Menu.
2. Select Safe Mode with Networking. This will allow you to access the internet and download drivers.
3. If you want to use the basic version of Safe Mode, select it. This will let you fix problems without an active internet connection.
4. Once you’ve booted into Safe Mode, close out of it and restart your computer normally.
5. Enjoy your newly upgraded PC!
Start Windows 8 and 10 in “Safe Mode with Networking.”
To boot into Safe Mode, power off your computer and hold down the Shift key while restarting it. You will now see a screen asking whether you want to start normally or enter Safe Mode. Select Start up Normally. This will take you directly to the desktop without having to go through the normal startup process.
When you are prompted to choose either Windows or Windows, select the latter. Then follow the prompts to logon to the operating system. Once logged on, open the Control Panel. In the System section, look under Advanced Options. There you will find Startup Settings. Click on the Startup tab. Here you will see options to disable Automatic Restart, Disable Fast Startup, Enable Debugging Tools for x64 Processes, and Troubleshoot compatibility issues. Choose one of those options and reboot your PC.
Once booted into Safe Mode, you can access the internet again.
While restarting, hold down the “Shift” key.
If you are having issues starting up Windows 10, hold down the Shift key during startup. This will bring up the Startup Settings menu where you can choose between Safe Mode with Network or Safe Mode with Command prompt. If you select Safe Mode with Network, it will allow you to connect to the internet and fix some problems. If you select Safe mode with Command Prompt, it will take you into a command prompt window where you can run commands to repair your computer.
How to Enter Safe Mode Using Advanced Troubleshooting in Windows 8 and 10
To reach Safe Mode, you need to boot your computer from an external source like CD/DVD or USB Flash Drive. After rebooting, you’ll see a few options on the left hand panel. Choose the option labeled “Safe mode.”
When you reboot, you’ll see a bunch of options on the left side of the screen. You can select one of those options to start up your computer in Safe Mode.
You can press F5 on your keyboard to access the Advanced Startup Options menu. From there, you can enable Safe Mode.
If you don’t want to go into Safe Mode, you can always just reboot your computer normally.
Start Windows in Safe Mode until you no longer require it.
Windows 10 includes a feature called “Safe Mode,” which enables you to start up your computer without having to connect to the Internet or use certain programs. You can use this option to troubleshoot problems with Active Directory, among other things.
To enable safe mode, follow these steps:
1. Restart your PC.
2. Press the F8 key repeatedly while your computer boots.
3. When prompted, select the Safe Boot option.
4. Wait for your computer to restart.
5. Once you’re logged in again, open the Control Panel.
How to Leave Safe Mode
To get out of Safe Mode in Windows 10, follow these steps:
1. Restart the PC. Press and hold the power button on the front of the computer for about five seconds. When the screen turns off, release the power button.
2. After the computer restarts, press and hold the F8 key during the startup process. You’ll see options to select Advanced Boot Options. Select Troubleshoot.
3. Click Startup Settings.
4. Scroll down to Recovery Environment.
5. Choose Repair Your Computer.
6. Follow the instructions on the screen to complete the repair.
7. Once the repair completes, choose Normal Startup.
If you still cannot boot normally after following these steps, there could be other problems with Windows that prevent it load properly.

Tim Wiley was a tech writer for seven years at Recode. In that time, he covered everything from basic browser.js and URL parameters to XHRs, performance, malware, security, enterprise apps, social media, and Windows secrets. He also written about how to hack Signal in 2016 and how to resist, or possibly even conquer, the zero-day threat.