How To Use Snipping Tool in Windows 7 & 10
The Snipping Tool is one of those tools you might never think about using because it seems like such a basic thing. But once you start taking screenshots, you’ll wonder how you ever lived without it. In fact, there are many different ways to use the Snipping tool depending on what you want to do. You can save images to your desktop, upload them to social media sites, send them via email, print them out, or even make GIFs. Let’s dive into some of the most common uses of the Snipping Tool and learn how to take advantage of the features within.
#1 Take Screenshots
You’ve probably used the Snipping Tool before, but did you know that you could actually take multiple screenshots at once? To do this, simply press Shift+Print Screen while pressing Ctrl+Alt+Delete simultaneously. This will bring up the Snipping Tool where you can select the area you’d like to capture. Once you’re done, just hit Enter and you’ll see all of your captures saved to your clipboard. From here, you can paste them anywhere you’d like. If you want to move them around later, just drag them wherever you’d like.
#2 Capture Webpages
If you’re looking to capture webpages, you don’t necessarily have to wait for someone else to load the site. Simply go to www.snipr.com/webpage and enter the URL of the webpage you’d like to capture, and you’ll instantly receive a link to download the screenshot.
#3 Create GIFs
GIFs are great for sharing images across social networks, especially Twitter, Facebook, Instagram, etc. However, if you want to add text to your GIFs, you can easily do so by opening the Snipping Tool and selecting “Text.” After doing so, you can type whatever you’d like over the image. When you’re finished, just hit Enter and the text will automatically be added to the image.
What is a screenshot?
A screenshot is just a picture that captures what is currently displayed on the computer screen. You might take one yourself by pressing Print Screen on your keyboard. Or, you could use a photo editing software like Photoshop or Gimp to make a screenshot of a webpage.
You can also take screenshots using apps such as Instagram, WhatsApp, Skype, Facebook Messenger, Snapchat, etc. If you do it regularly, you will notice how much easier it becomes to capture things that you see on your phone. In fact, there are even some apps specifically designed to help you take screenshots.
Why doesn’t the screen clipping tool work anymore?
In OneNote 2016, Microsoft introduced a new feature called Screen Clipping. This allowed users to copy text directly onto the Notes section without having to use the mouse. However, it appears that Microsoft has removed this functionality from OneNote 2017 and later.
If you try to clip something now, nothing happens. You can still do it manually, but the shortcut keys are no longer recognized. If you’re one of those people who uses the keyboard to navigate around OneNote, this could prove problematic.
The good news is that Microsoft does plan to bring back some of the missing features. They’ve confirmed that the keyboard shortcuts will return in a future release. So, while you wait for that update, here are some alternatives.
In Windows 10, where is the Snipping Tool?
There are several ways to open up the Snipping tool in windows 10.
Press the Windows key + R keyboard combination to open the app.
The Snipping tool is located under the Windows accessories category.
To launch the Snipping tool, simply type “Snipping Tool” into the Search bar at bottom left corner of the window.
Once the Snipping tool is launched, select the area you want to capture, and press CTRL + S.
How to Use the Windows 7 Snipping Tool
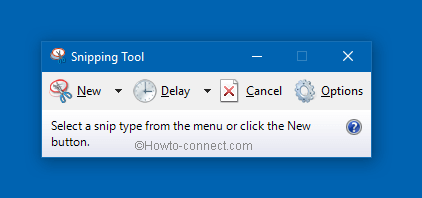
Open the Snipping Tool from either the Start Menu or the Run Window. You’ll see the following screen:
The method to access the Sniping Tool is different between Windows 7 and Windows 10.
Understanding the interface of the Windows Snipping Tool
The Windows Snipping Tool is one of those tools you use every day without thinking about it. You just press Print Screen, select a region of the screen, and save the image.
But what happens when you want to do something else while you’re snipping? Or maybe you want to save the image later, but don’t know how to go about doing that? In this article we’ll show you how to use the Windows Snipping Tool and understand its interface.
How to Use Windows’ Snipping Tool to Take Screenshots
To take a freeform screenshot on Windows 10, hold down Shift while grabbing the mouse pointer. You’ll see a box pop up around the cursor, showing where you’re about to grab. Drag outwards to snap a picture.
If you want to take a Window Snip instead, press Alt+Space and then drag your mouse over the area you want. A rectangular box appears, letting you select what part of the window you’d like to capture. Press Enter to save the selection and exit the tool.
To take a Rectangular Snipe, press Ctrl+Alt + Spacebar and then drag the rectangle over the portion of the screen you want to capture. Release the keys once you’ve selected the area you want to snipe.
Once you’ve captured the image, open it up in the Snipping Tool. From there, you can crop it, change the size, add text, etc.
How to Use the Snipping Tool App to Edit and Save Screenshots
The Snipping Tool is one of those apps that you don’t use very often, but it’s always there when you want it. You just open the app, press “Take Screenshot,” and you’re done. But what if you want to change something about the screenshot before you save it? Or maybe you want to add text to it? Let’s take a look at how you do that.
Step 1: Open the Snipping Tool
You’ll find the Snipping Tool under the Accessories folder in Windows 10. If you haven’t installed the app yet, you’ll see a prompt asking whether you’d like to install it now. Click Install Now.
Step 2: Take Your Screenshots
Now, let’s say you want to make some changes to your screenshot. To do that, you’ll need to open up the app. This will bring up a small window where you can select the type of file you want to capture.
For example, if you want to capture a web page, you’ll probably want to select Web Page. Then, you’ll want to enter the URL of the site you want to capture. After that, tap Save.

Tim Wiley was a tech writer for seven years at Recode. In that time, he covered everything from basic browser.js and URL parameters to XHRs, performance, malware, security, enterprise apps, social media, and Windows secrets. He also written about how to hack Signal in 2016 and how to resist, or possibly even conquer, the zero-day threat.