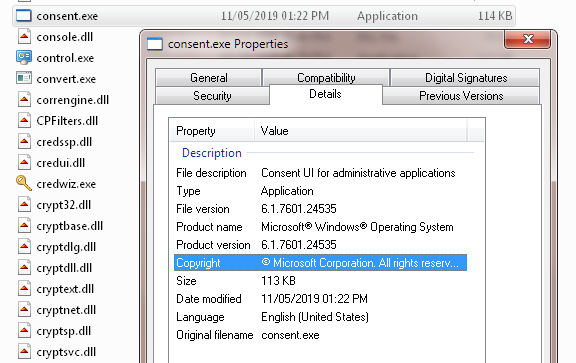
What is consent.exe and should I delete it?
The term “consent.exe” is used to describe a number of different processes. In most cases, it refers to a legitimate Windows executable file that loads before other important Windows processes. However, some malware writers use this name to trick unsuspecting users into thinking that the file is something else.
In reality, consent.exe isn’t harmful to your computer. If you’re running Windows 10, you probably already have it installed. If you see a window pop up saying “Notepad is starting,” you don’t need to worry.
Consent.exe: What is it?
Consents.exe is a component of the BekrefterUi for administrators. This tool allows you to display information about the consent status of each installed software package. You can use this tool to check whether the following programs are allowed to run on your computer: Adobe Reader, Microsoft Office, Java Runtime Environment, Flash Player, Silverlight, Acrobat Reader DC, Skype for Business Server, Oracle Instant Client, SPSS Statistics, SAS Visual Analytics, Access Database Engine 2010 Redistributable, SQLite, MySQL Workbench, MySQL Community Server, PostgreSQL, Apache Tomcat 8.5.x, IBM WebSphere Application Server V8.0, OpenOffice.org 4.1.3, or LibreOffice 5.2.4.
Is consent.exe causing High Network Usage?
Consent.exe is an executable that runs programs or scripts on Windows computers without displaying any UI. However, it consumes a lot of disk space. If you are experiencing high network usage, it might be because of consent.exe. You can check whether consent.exe is running on your computer by opening Task Manager and searching for “consent.” If consent.exe is running, you can stop it by pressing Ctrl + Shift + Esc keys together.
If consent.exe is still running even after stopping it, you can try deleting some temporary files and folders. Open File Explorer and navigate to %temp% folder. Delete all files and subfolders inside temp folder except those containing.tmp extension. Be careful while doing this. Also, make sure that you don’t delete anything important.
Is consent.exe causing High CPU Usage?
Consent.exe is an executable program which runs automatically whenever you use Windows Update or install any software on your PC. It’s used by Microsoft to ask permission before installing updates and programs on your system. However, it can take up quite a lot of space on hard drives, especially if you don’t regularly uninstall unused apps. If your machine starts running slow, check out our guide on how to fix high memory usage.
How to check GPU Usage of consent.exe?
To check consent.exe GPU usage, open Task Manager window and look for the consent.exe process in the name column and check the gpu usage column.
I hope you were able to learn about consent.exe file and how to remove it. Also share this article on social media if you found it helpful.
Let us know in the comments below if you face any other consent.exe related issues.
STORY: “How to Fix Your Computer When It Freezes Up”
When your computer freezes up, it becomes completely unresponsive. There are many reasons why this might happen, including hardware failure, malware infection, power surges, overheating, etc. Whatever the cause, it’s important to identify what’s causing the problem and solve it quickly. Here are some steps you can take to diagnose and fix your frozen PC.
Is consent.exe causing High Disk Usage?
Consent.exe is an executable program used to install software on Windows 10 devices. It is part of Microsoft’s Digital Rights Management (DRM). In 2017, the average size of the file grew to around 2MB. But what does it really do? And how much disk space does it consume? Let’s find out together.
The consent.exe file is an executable file which contains instructions for the operating system to execute a piece of code called the “installer.” When you download an app or game onto your device, it is usually stored inside a folder named “Program Files\Microsoft Corporation\Windows Store,” where the installer is located. Once you run the installer, the application is automatically downloaded to your computer.
If you want to uninstall an app, you must delete the entire folder containing the installer. However, some programs include multiple folders. These folders contain files like “AppName.exe”, “AppName.pdb”, “AppName.dll”, etc. Deleting just one of these folders won’t necessarily uninstall the app because it might still exist in another location.
To completely uninstall an app, you need to delete every single file contained within the folder. You can use File Explorer to locate the folder containing the installer. To do this, open the Start menu, type “File Explorer” into the Search box, and press Enter. Select the folder containing the installer from the list of items displayed. Then select Delete from the context menu. Repeat this step for each folder containing the installer.
Now, let’s talk about the size of the consent file. On my PC, the average size of consent.exe is 2.3 MB. Depending on the number of apps you have installed, this figure can vary quite a bit. For instance, I have around 30 apps installed on my PC and the average size of consent is 3.1 MB.
However, the size of the file doesn’t always grow over time. Sometimes, it stays constant even though you’ve added new apps to your PC. This happens because the installer is cached, meaning that it stores the information about the app in memory rather than writing it to disk. As long as you don’t add or uninstall apps, consent.exe will remain small.
If you notice that the size of consent.exe grows over time, it could indicate that you have too many apps installed or you haven’t removed old ones properly.
Is consent.exe a Virus or Malware?
Consent.exe is a fake program that pretends to be a legitimate Windows application. It will try to trick your computer into believing that it’s a real program, and it will do anything to make sure that happens.
If you’re using a Mac, there are similar programs that pretend to be legitimate applications. They’ll try to convince you that they’re something else.
What does this mean for you? If you think you’ve found a virus, don’t panic. You can easily fix it. But if you want to learn how to stop it from happening again, keep reading.
Consent.exe: Is it a virus?
The latest version of the popular anti-malware software Malwarebytes Anti-Malware detected a suspicious file named “consent.exe”. Upon closer inspection, the file turned out to be a piece of malicious code disguised as a legit Windows process.
When opened, the file displays a warning stating that the application cannot be run because it contains a potentially dangerous component. However, the file seems to be harmless since it does not contain any harmful components.
In fact, the file is actually a part of a fake Windows 10 update. In addition to displaying a misleading warning, the file also tries to trick users into downloading additional programs.
This particular variant of malware disguises itself as a legitimate Windows update, making it difficult to detect. Once installed onto a system, the malware starts scanning the computer for files and folders containing sensitive information.
Once found, the malware copies those files to a remote server where it sends the data to cybercriminals via email.
To prevent such infections, always make sure that you are running the latest version of Malwarebytes Anti-malware.
If you do suspect that your machine has been infected, you can download the free trial version of Malwarebytes and scan your device manually. You can find instructions here.
How Do I Get Rid of Consent.exe?
Consent.exe is one of the most dangerous threats ever discovered. This malicious application is capable of deleting important data, corrupting system settings, and even hijacking browsers. If it gets into your computer, you won’t know where it came from and how to remove it. You don’t want to risk losing anything important, do you? So what are you waiting for? Let’s see how to remove Consent.exe virus safely and effectively.
Step 1: Scan Your PC With MalwareBytes Anti-malware
Download and install MalwareBytes Anti-Malware(MBAM). Launch MBAM and scan your entire hard disk drive. Click “Scan Now”. After scanning completes, make sure the following items are checked:
1. Select “Perform Quick Scan”, then press Next button.
2. Make sure the box beside “Show notifications while performing scans” is unchecked.
3. Press Start button to begin scanning process. When finished, double check everything and click OK.
4. On next screen, select Perform Full System Scan. Wait till the program finishes cleaning up.
Step 1: Conduct a computer scan.
The first step in protecting yourself against malware is to run a scan of your computer. This allows us to see what programs are installed on it, how many viruses there are, and whether your operating system is infected. If we find anything suspicious, we’ll let you know.
Step 2: Remove Malware.
Once you’ve scanned your computer, it’s time to clean up any malicious software. We recommend running a full system scan with our free Antivirus software. You can download it here.
Step 3: Update Software.
Next, make sure that all of your important programs are updated. Check out our list of recommended apps for Windows 10 and Mac OS X.
Step 4: Back Up Files.
Finally, we suggest creating a backup of all of your files. To do this, use one of our recommended cloud storage options.
Step 2: Reverse every modification made by the malware.
The next step is to reset everything. This includes clearing cookies, cache, history, and browsing data. If you’re worried about losing some of your personal information, don’t worry – it’s safe. You’ll lose access to your saved passwords, but nothing else.
If you’ve been infected with adware, there are several steps you can take to fix the problem. First, uninstall the program. Next, delete the following files:
* %appdata%\Microsoft\Internet Explorer\Quick Launch\User Pinned\TaskBar
* %AppData%\Roaming\Microsoft\Windows\Recent
* %LocalAppData%\Temp
You can find instructions on how to do this here.
Find the program you want to remove and click “Remove”, then follow the prompts.
Google Chrome:
How To Block Cookies And Site Data In The New Version Of The Browser
Open the Options dialog box by pressing Alt + Ctrl + O simultaneously. Then go to the Privacy section. You’ll find the option called “Cookie settings”. Here you can uncheck all cookies except those marked “Acceptable”. If you want to block site data, check the box labeled “Block third party sites”, too.
You can always change the privacy options later on by opening the same window again. Just press Alt + Ctrl + P simultaneously.
Firefox:
“Delete everything”
If you’re tired of having to keep deleting your history, bookmarks, passwords, etc., every time you start Firefox again, here are some tips to help you clean up your browsing experience.
1. Delete Everything
from the dropdown menu. Then scroll down to the Privacy section and uncheck the box next to “Keep my History.” Click OK.
2. Reset Your Bookmark File
In the General tab, check the box next to “Reset Mozilla…” and hit OK. Now close out of the preferences window and restart Firefox.
3. Clear All Cookies
Select “Cookies and Site Data,” then press the button labeled “Clear Now.” You’ll see a warning about clearing your cache and history, but it’s safe to proceed.
Internet Explorer:
How To Remove Addons You Don’t Want
If you’re like most people, you use Internet Explorer every day. But there are some add-on features that you might not know about. Here’s how to disable those annoying ones.
1. Open Internet Explorer.
2. Click “Tools.”
3. Under “Manage add-ons,” choose “Add-ons.”
4. Look under the heading “Extensions” and look for anything with “Adobe” in it. If you find one, select it and press “Disable.”
5. Repeat steps 2-4 for each extension you’d like to delete.
6. Restart Internet Explorer.
7. Go back into the “Manage add-on” screen and make sure everything is disabled.
8. Close Internet Explorer.
9. Reopen Internet Explorer.
10. Refresh the browser window.
11. Enjoy your clean browser.
Safari:
How To Remove All Browser Settings And Start Over
Open Safari and click on Safari. This opens up the Safari app.
Click on Preferences. This opens up the preferences window.
Select General. This opens up the general tab.
Scroll down to Reset Information. This resets everything including cookies, history, passwords, etc.
Press Restore Default State Now. This restores Safari to how it was when you opened it for the very first time.
You can now close the preferences window.
If you want to reset Safari again, repeat steps 2 – 5. If you don’t want to do that, just press Continue Anyway.
Now open Safari and enjoy your clean state.

Tim Wiley was a tech writer for seven years at Recode. In that time, he covered everything from basic browser.js and URL parameters to XHRs, performance, malware, security, enterprise apps, social media, and Windows secrets. He also written about how to hack Signal in 2016 and how to resist, or possibly even conquer, the zero-day threat.